TABLE OF CONTENTS
ACE:AI Usage
Overview
For an overview of ACE:AI, see the this article.
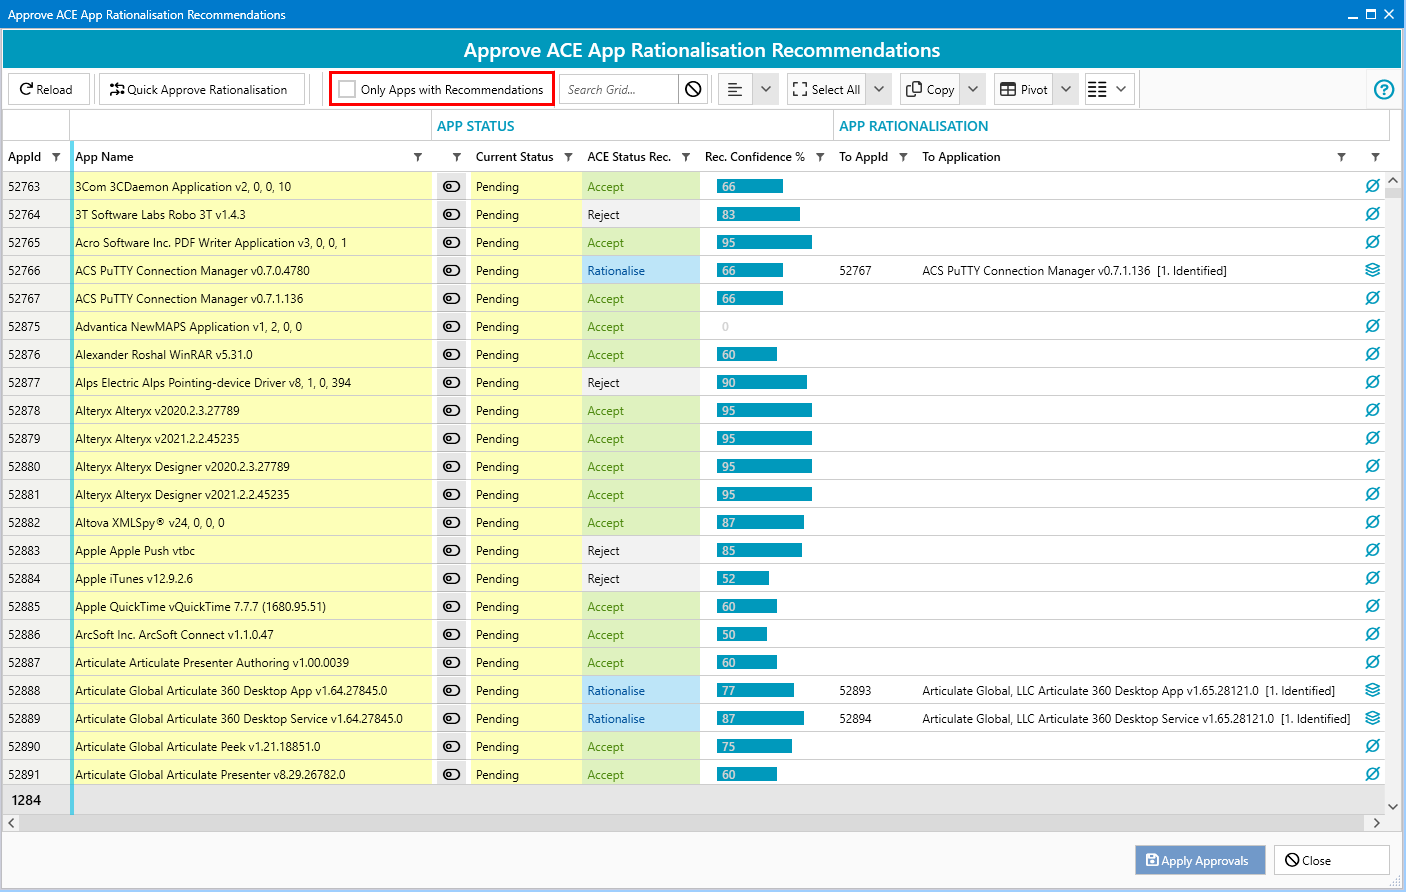
To view ACE:AI normalisation or rationalisation suggestions:
- Navigate to Applications -> All Applications.
- Enable
Pendingin theRationalisation Statussection of the ribbon.
- Select one or more applications in the main grid.
- Click
ACE RationalisationorACE Normalisationin the ribbon.
- The ACE window will open, displaying recommendations highlighted in yellow. You can toggle these recommendations on or off if needed.
Application Normalisation, Categories, and Descriptions
Overview
Normalisation is the process of standardising application names for consistency, particularly across similar products from the same vendor. This step is generally completed before rationalisation to simplify downstream processes.
| Field | Changes | Discovered Example | Normalised Example |
|---|---|---|---|
| Vendor | Converted to a user-friendly name | Adobe Inc / Adobe Incorporated / Adobe Ltd | Adobe |
| Name | Vendor name removed; additional cleaning applied | Adobe Reader | Reader |
| Version | Reformatted to Major.Minor.Build.Revision; redundant zeros and text removed | 11.00.0002.3" | 11.0.2.3 |
Application categories can be assigned during normalisation. Example categories include Multimedia, Finance, and Application Components.
Application descriptions are retrieved via the OpenAI API and added if required. Any existing Application Descriptions will be overwritten when this feature is used.
How to Manually Normalise and Categorise Applications
- In the Applications module, ensure the applications that require normalisation are visible. Typically, this requires enabling
Pendingin theRationalisation Statuson the ribbon.
- In the main grid, select the applications to normalise (or use
Select All). - Click
ACE Rationalisation→ACE Normalisationin the ribbon.
- Normalisation suggestions will be highlighted in yellow. Examples of suggested changes may include:
- The vendor is changed to
Adobe - Cleaning application names
- Removing superfluous characters from version numbers
- Moving Edition details out of the application name
- Adding ACE categories

- The vendor is changed to
Approving Normalisation Suggestions
- Approve suggestions individually by clicking the toggle button to the left of each suggestion (the suggestion will turn green).
- Approve in bulk by selecting multiple (or all) rows, then clicking
Quick Approve Normalisationin the ribbon. - Alternatively, right-click selected rows and choose
Approve Normalisation→Allfor further options. - Approved items are highlighted in green.

- To finalise the process, click
Apply Approvals.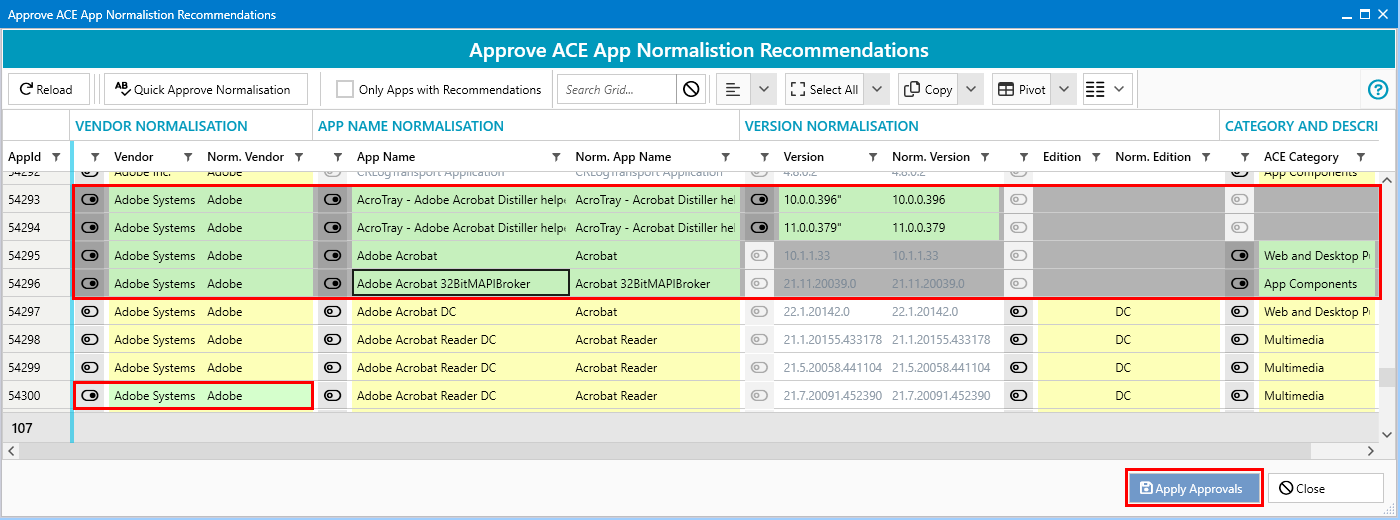
- Click
Closeto review the updated application data in the Applications grid.
Application Rationalisation
- In the Applications module, ensure visibility of applications requiring rationalisation. Typically, enable
Pendingin theRationalisation Statuson the ribbon.
- In the main grid, select the applications to rationalise (or use
Select All). - Click the
ACE Rationalisationbutton in the ribbon.
- A window will display rationalisation suggestions in yellow, along with confidence ratings based on decisions made by other ManagementStudio users.
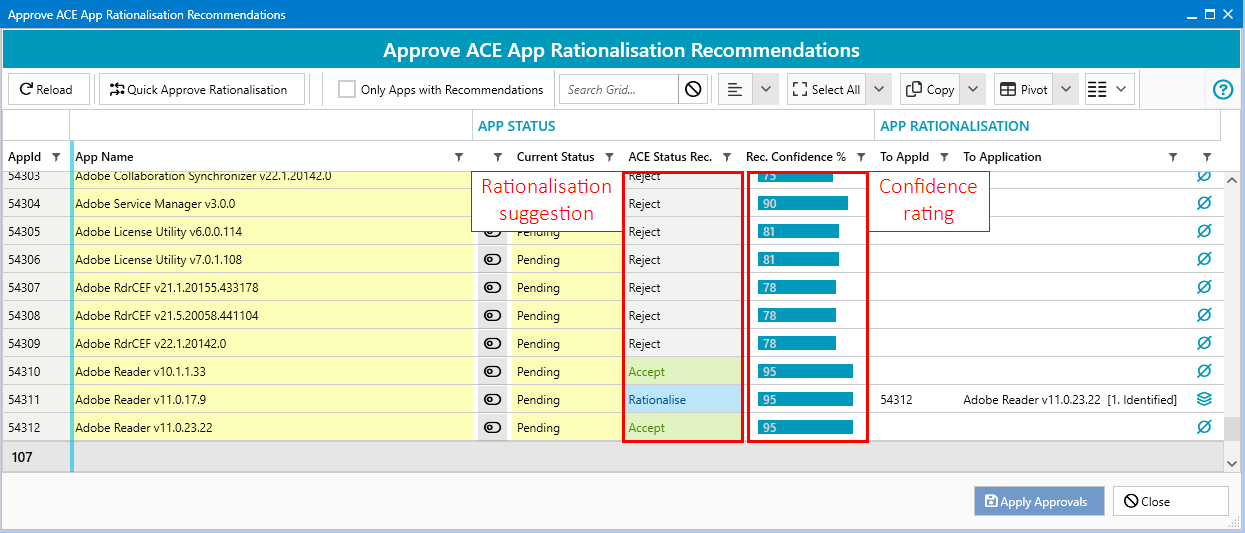
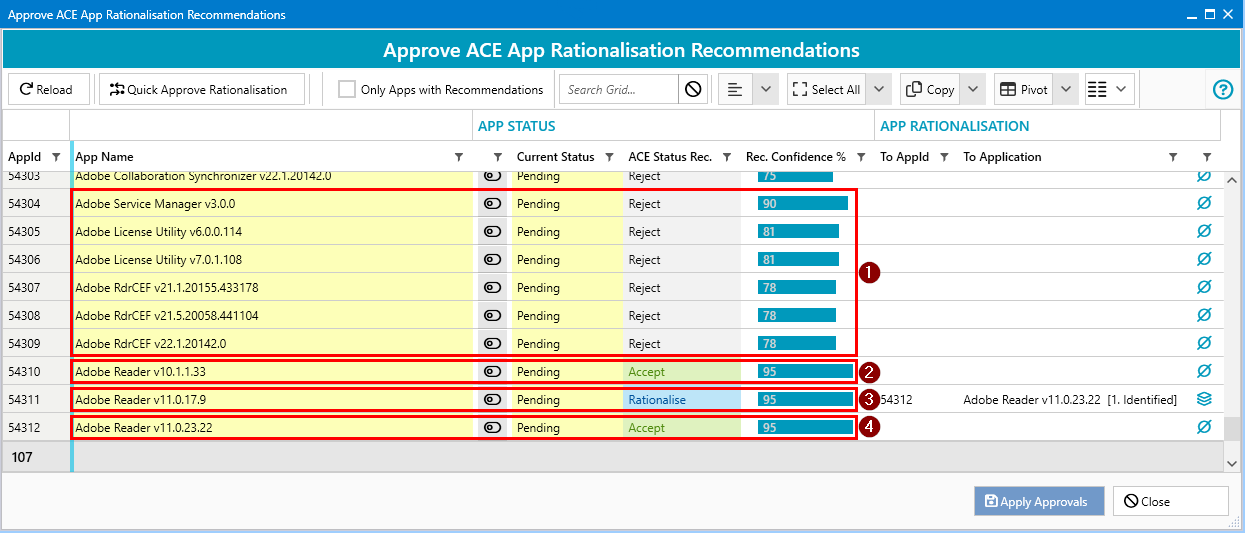
- In the example below the following rationalisation decisions are suggested:
- Reject these applications (in this case they are components of another application)
- Accept Adobe Reader 10.1.1.33
- Rationalise Adobe Reader 11.0.17.9 to Adobe Reader 11.0.23.22
- Accept Adobe Reader 11.0.23.22
Approving Rationalisation Suggestions
- Approve individually using the toggle button beside each suggestion (changes highlight green).
- Approve in bulk by selecting all desired rows and clicking
Quick Approve Rationalisation. - Alternatively, right-click and choose
Approve Rationalisation→Allfor more detailed options.
- To apply decisions, click
Apply Approvals. - Click
Closeto return to the Applications grid and review the processed applications.
Further Support
If you require further support, please visit ManagementStudio's Service Desk to search the knowledge base or create a new support ticket.
Was this article helpful?
That’s Great!
Thank you for your feedback
Sorry! We couldn't be helpful
Thank you for your feedback
Feedback sent
We appreciate your effort and will try to fix the article