TABLE OF CONTENTS
- Prerequisites
- Installing the ManagementStudio Software Development Kit
- Preparing to Run a Report
- Create a Simple User Migration Report
- Create a Simple Application Report
- Create a Report showing Users and their Applications
- Further Support
This article demonstrates how to extract data from the ManagementStudio API using Microsoft Visual Code. This is aimed at users who are new to the API and guides the reader through building queries in a visual way before using in ManagementStudio.
Prerequisites
- Microsoft Visual Studio Code (download from Microsoft) with the PowerShell extension installed.
- A ManagementStudio installation, updated to the latest release.
Installing the ManagementStudio Software Development Kit
- Download the ManagementStudio Software Development Kit (SDK). This can be located by appending "/project/sdk" to the ManagementStudio URL. For example, if ManagementStudio is installed to https://managementstudio.local, the SDK download URL would be:
- https://managementstudio.local/project/sdk
- Authenticate to the Portal by entering your ManagementStudio username and password when prompted.
- Click Download ManagementStudio PowerShell SDK.
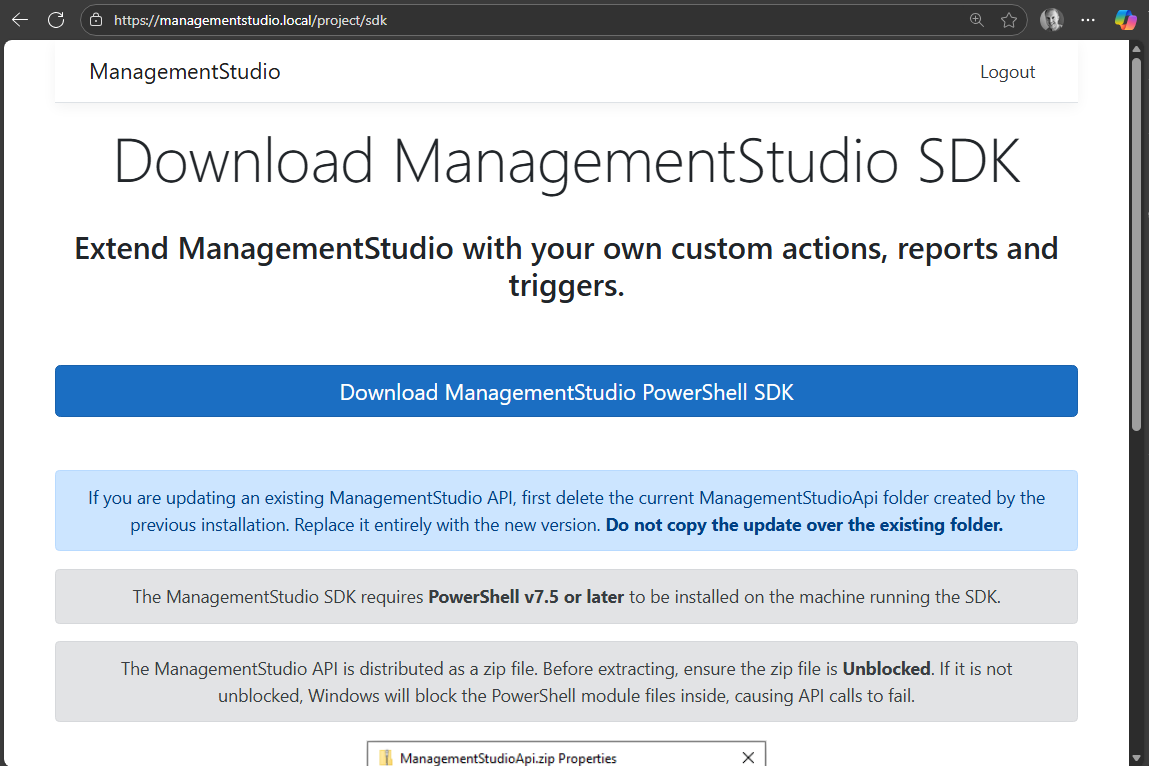
- Locate the file downloaded in the previous step, right-click and select Properties.
- If the file is blocked, click Unblock and Apply > OK to confirm the change.

- Unzip this file to a local folder on your computer such as C:\ManagementStudio_SDK.
- Verify that two subfolders have been created within this folder: ManagementStudioApi and Examples.
Preparing to Run a Report
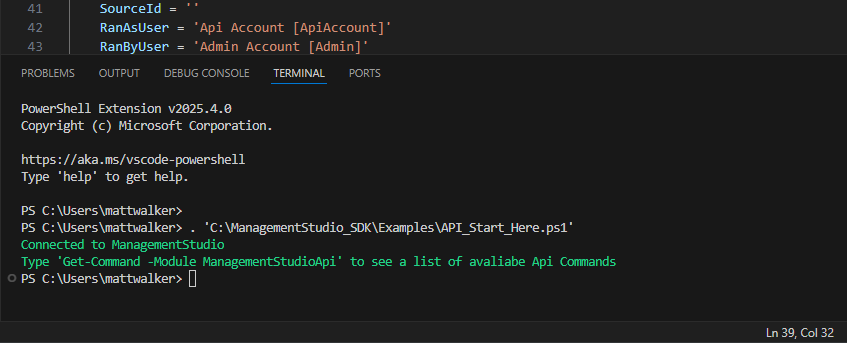
- Open C:\ManagementStudio_SDK\Examples\API_Start_Here.ps1 in Visual Studio Code.
- Update the following variables specified between lines 24 to 33 as appropriate for your requirements.
- AutomationFolder
- LogsFolder
ApiUrl
UserName
Password
ProjectId
Module
ScriptName

Note: If there are multiple projects running in ManagementStudio, the Project Id can be verified from the Project Settings tab of Administration > Project Settings.

- From the menu bar, click Run > Start Debugging (#1 below) to start the script. Alternatively, click the play button (#2) or press F5.

- The script will run in the Terminal panel towards the bottom of the window. A confirmation message will be displayed when VS Code successfully connects to the ManagementStudio API.
Create a Simple User Migration Report
- Create a connection to the ManagentStudio API, as detailed in Preparing to Run a Report, above.
- Copy and paste the command below into the Terminal panel and press return. This will run the command and all the User Migration records will be displayed in the Terminal panel.
Get-MSUserMigrations -All
Using -All will return all fields for every User Migration in ManagementStudio. Press [CTRL]+C to stop the command early if the output is excessively long.
- To display the results in a table in a new window use the following command:
Get-MSUserMigrations -All | Out-GridView
- To limit this to 10 records use the following command:
Get-MSUserMigrations -All -Take 10 | Out-GridView

Create a Simple Application Report
- Ensure you have run the steps in the section Preparing to Run a Report, above.
- To get a list of the first 10 applications in ManagementStudio run this command in Visual Studio Code:
Get-MSApplications -All -Take 10
- To display this data in a table in a new window run:
Get-MSApplications -All -Take 10 | Out-GridView

Create a Report showing Users and their Applications
- Ensure you have run the steps in the section Preparing to Run a Report, above.
- Copy and paste the following commands into Visual Studio Code's Terminal:
$MyApps = New-MSDataminingTier -Module Applications -Fields @('AppVendor','AppName','AppVersion')
$MyReport = Get-MSUserMigrations -All -Take 3 -IdsOnly | Get-MSUserMigrationDataminingReport -Fields @('Firstname', 'LastName') -AdditionalTiers @($MyApps)
$MyReport.data | Out-GridView- The first command creates an application data mining tier object ($MyApps) that contains the application vendor, name and version.
- The second command retrieves the first three User Migrations, links them to the application tier, and stores them in the $MyReport object.
- The final command outputs the $MyReport object into a new window.

Further Support
If you require further support, please visit ManagementStudio's Service Desk to search the knowledge base or create a new support ticket.
Was this article helpful?
That’s Great!
Thank you for your feedback
Sorry! We couldn't be helpful
Thank you for your feedback
Feedback sent
We appreciate your effort and will try to fix the article