TABLE OF CONTENTS
- Customising Surveys and Test Sign-Offs with PowerShell, JavaScript, and CSS
- PowerShell
- JavaScript
- Cascading Style Sheets (CSS)
- Further Support
Customising Surveys and Test Sign-Offs with PowerShell, JavaScript, and CSS
ManagementStudio surveys and test sign-offs support customisation using PowerShell, JavaScript, and Cascading Style Sheets (CSS). These technologies allow administrators to extend form functionality and tailor the appearance or behaviour to project requirements.
The following sections provide a summary of each technology, instructions for use, and practical examples. While examples focus on Application Surveys, the process is identical for Test Sign-Offs.
| Technology | Description |
|---|---|
| PowerShell | Automate ManagementStudio tasks and interact with external applications using the API. |
| JavaScript | Programmatically modify HTML structure and add dynamic form functionality. |
| CSS | Control the appearance of HTML elements (e.g., fonts, colours, backgrounds) through style rules. |
PowerShell
Overview
PowerShell scripts in ManagementStudio enable automation within surveys, including interaction with external APIs and the platform’s own functionality. PowerShell code in surveys is executed when the survey is submitted.
Execution
- PowerShell scripts run upon HTML form submission by the end-user.
- A log file is generated for each executed script and is stored within the project's
File Storage Pathas defined during installation. - Log file example path:
C:\Tmp\Project_1\Logs\App Owner Survey - On Submit Script_April_2021.log
Adding PowerShell to a Portal Form
- Navigate to
Administration → Portal Settings → Portal Forms [Module];OrAdministration → [Module] → Surveys (Moved) - Select the desired portal form.
- Enter your script in the
On Submit PowerShellsection. - Click
Save Changesto apply the script.

Example: Move Application to Process on Survey Submission
Scenario: When an application owner completes a survey, the application should be moved to a new process stage (2. Validating\Survey Pass).
# Define the process to target
$ProSub = "2. Validating\Survey Pass"

# Pass the module, target process, and instance to Get-MSConfigProcess
$ProcessDetail = Get-MSConfigProcess -Module $ScriptArgs.Module -ProcessPath $ProSub -InstanceIds $ScriptArgs.Items

# Move the application to "2. Validating\Survey Pass"
Move-MSModuleItemProcesses -Module $ScriptArgs.Module -Ids $ScriptArgs.Items -ProcessId $ProcessDetail.ProcessId -SubProcessId $ProcessDetail.SubProcessId
- The
$ScriptArgs.Moduleparameter ensures the script is portable across modules. - Add this code to the
On Submit PowerShellpanel and save.
For additional PowerShell automation examples, refer to the PowerShell Examples section in the Knowledge Base.
JavaScript
Overview
Custom JavaScript is executed after the survey's HTML is fully rendered. It can interact with, traverse, or modify HTML elements on the page.
Execution
- Use JavaScript to reference and manipulate elements by their unique element ID.
- To identify an element’s ID, use browser developer tools or view the page source.

Note: Element IDs are unique per survey form and will need to be updated if code is copied between forms.
Adding JavaScript to a Survey
- Locate the survey and open its edit page.
- Enter your code in the
Custom Javascriptsection. - Click
Save Changesto commit the script.

Example: Rename a Field Title
Scenario: Change the field label App Name to Application Name.
Suppose the element ID for the field title is survey-label-id-63. Use the following script:
var headerText = document.getElementById("survey-label-id-63");
headerText.innerHTML = "Application Name";
- Add this code to the
Custom JavaScriptpanel andSave Changes. - Custom JavaScript runs each time the survey is loaded, including for links already issued.
Cascading Style Sheets (CSS)
Overview
Custom CSS is injected into the survey’s HTML during rendering, enabling the administrator to modify the appearance of any form element.
Execution
- Reference elements by their element ID for targeted style changes.
- Use browser developer tools or page source view to identify element IDs.
Note: Element IDs are unique for each survey form and should be reviewed if copying code.
Adding Custom CSS to a Survey
- Open the survey configuration page.
- Enter your styles in the
Custom CSSsection. - Click
Save Changesat the top of the form.

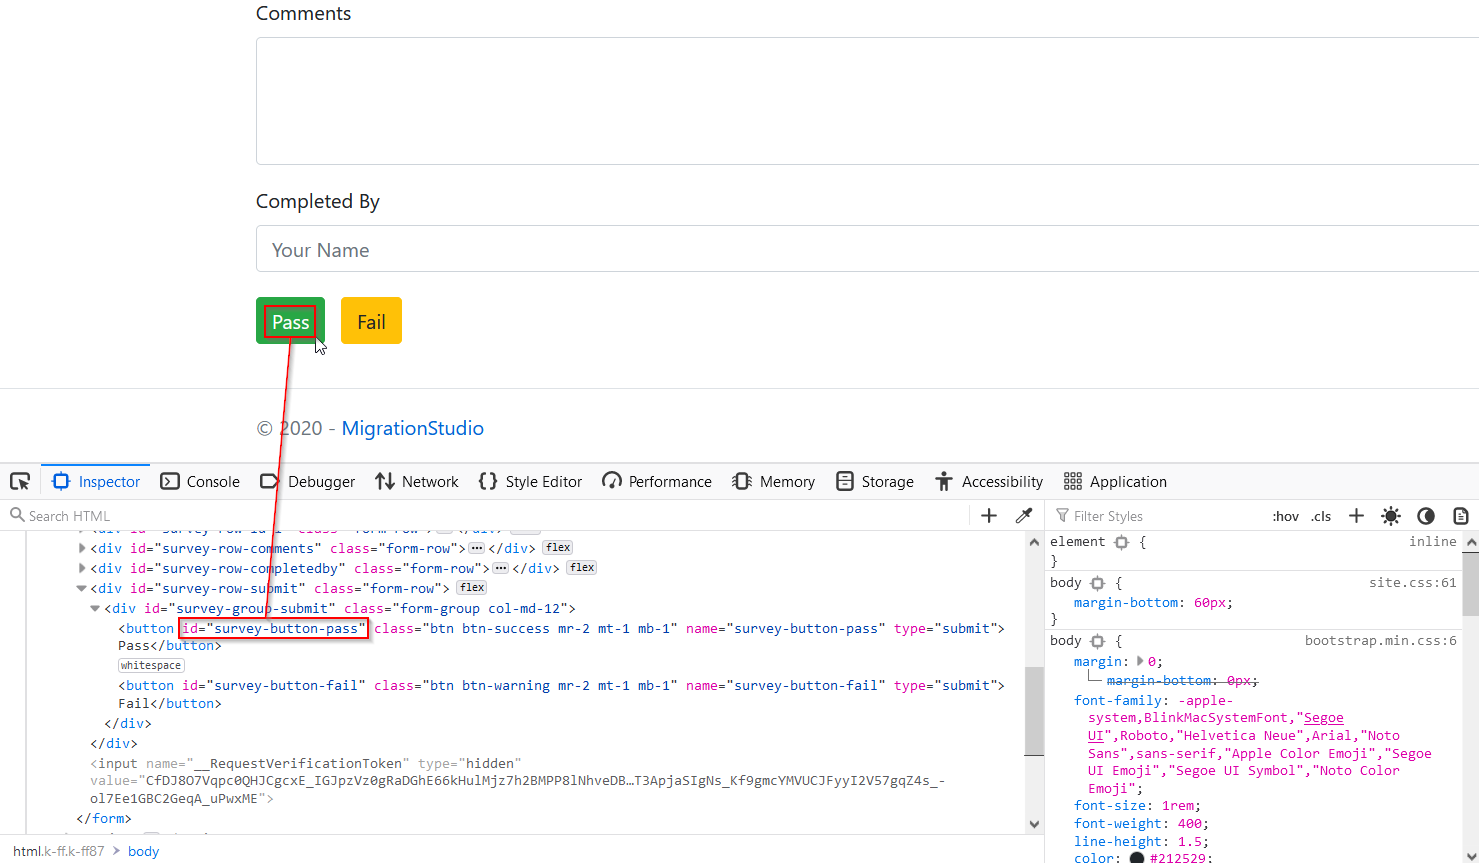
Example: Change Button Appearance
Scenario: Change the background of the Fail button to dark red and its text to white.
Suppose the button’s element ID is survey-button-fail. Use this CSS:
#survey-button-fail {
    background-color: darkred;
    border-color: darkred;
    color: white;
}
- Add this style definition to the
Custom CSSpanel and save.
Note: Some elements, including buttons, may also have specific border colours. For a list of supported HTML colour names, see: HTML Color Names
Further Support
For additional assistance, visit the ManagementStudio Service Desk to search the knowledge base or submit a support ticket.
Was this article helpful?
That’s Great!
Thank you for your feedback
Sorry! We couldn't be helpful
Thank you for your feedback
Feedback sent
We appreciate your effort and will try to fix the article